Go Back
The chocolate chip cookie is more than just a sweet treat; it is a culinary icon that has captured the hearts of dessert lovers around the globe. Its origin can be traced back to the 1930s when Ruth Wakefield, the owner of the Toll House Inn in Massachusetts, created this delightful confection by adding chopped chocolate bars to her cookie dough. Little did she know that this simple yet innovative addition would lead to the birth of an American classic. Over the decades, chocolate chip cookies have evolved, becoming a staple in homes, bakeries, and cafes, cherished for their buttery flavor and chewy texture.

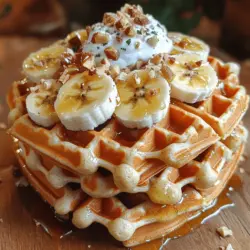
Fluffy Peanut Butter Protein Waffles

Discover the timeless joy of baking classic chocolate chip cookies with our ultimate guide. Learn the history behind this beloved treat, along with essential ingredients and techniques for perfect results every time. From understanding the role of flour and sugars to step-by-step instructions and helpful tips for cooling and storing, this guide will equip you with everything you need to create delicious homemade cookies. Embrace the warmth of sharing these delightful sweets with loved ones and elevate your baking skills today!

Ingredients
  

1 cup whole wheat flour

1 scoop protein powder (vanilla or unflavored)

1 tablespoon baking powder

1/2 teaspoon salt

1 tablespoon coconut sugar (or your preferred sweetener)

1 cup almond milk (or any milk of your choice)

1/4 cup peanut butter (smooth or crunchy)

2 large eggs

1 teaspoon vanilla extract

Optional toppings: sliced bananas, maple syrup, chopped nuts, or yogurt

Instructions
 

Preheat the Waffle Iron: Begin by preheating your waffle iron according to the manufacturer's instructions to ensure it's ready for the batter.

    Combine Dry Ingredients: In a large mixing bowl, whisk together the whole wheat flour, protein powder, baking powder, salt, and coconut sugar until the mixture is well combined and free of lumps.

      Mix Wet Ingredients: In a separate bowl, combine the almond milk, peanut butter, eggs, and vanilla extract. Whisk these ingredients vigorously until they form a smooth, creamy mixture.

        Combine Mixtures: Gradually pour the wet ingredients into the bowl containing the dry ingredients. Use a spatula or wooden spoon to gently stir the mixture until just combined. Take care not to overmix; a few lumps are perfectly fine and will help ensure your waffles are fluffy.

          Cook the Waffles: Lightly grease the waffle iron with cooking spray or a small amount of oil. Pour an appropriate amount of batter into the preheated waffle iron—typically about 1/2 to 3/4 cup, depending on the size of your iron. Close the lid and cook according to the waffle iron's instructions, usually for about 3-5 minutes, or until the waffles are golden brown and crisp to the touch.

            Serve and Enjoy: Carefully remove the cooked waffles from the iron and place them on a serving plate. Dress them up with your choice of toppings such as sliced bananas, a generous drizzle of maple syrup, crunchy chopped nuts, or a dollop of yogurt for added creaminess.

              Leftovers: If you have any leftover waffles, allow them to cool completely. Store them in an airtight container in the refrigerator for up to 3 days, or freeze them for longer storage options.

                Prep Time, Total Time, Servings: 10 minutes | 20 minutes | Serves 2-4

                  - Presentation Tips: For an appealing presentation, stack the waffles high on a plate and garnish with a sprinkle of nuts and fresh fruit on top. A light dusting of powdered sugar can also add a lovely touch!