Go Back
Few desserts evoke as much nostalgia and comfort as chocolate chip cookies. Their warm, gooey centers paired with the rich, melted chocolate create a symphony of flavors that tantalizes the taste buds. The allure of chocolate chip cookies lies not only in their taste but also in the memories they conjure—whether it's the scent wafting through a family kitchen or the joy of baking with loved ones on a rainy afternoon. For many, homemade cookies represent more than just a treat; they symbolize love, tradition, and togetherness.

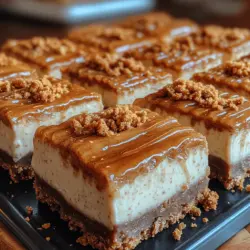
Decadent Biscoff Cheesecake Bars

Discover the joy of baking with this ultimate guide to homemade chocolate chip cookies! This article takes you through everything you need to know, from selecting the right ingredients to mastering the perfect technique. Uncover the science behind flavors and textures, and learn about optional mix-ins that can elevate your cookies. Whether you're a beginner or a pro, you'll find tips and a detailed step-by-step recipe to help you create the ultimate chocolate chip cookies that evoke nostalgia and warmth. Get ready to bake up some delicious memories!

Ingredients
  

1 1/2 cups Biscoff biscuits (finely crushed into crumbs)

1/2 cup unsalted butter (melted)

2 cups cream cheese (softened to room temperature)

1 cup powdered sugar

1 teaspoon vanilla extract

1/2 cup heavy cream

1/2 cup Biscoff spread (slightly warmed for drizzling)

Optional: Whole Biscoff biscuits for topping and garnish

Instructions
 

Prepare the Crust:

    - Preheat your oven to 350°F (175°C).

      - In a medium-sized mixing bowl, combine the finely crushed Biscoff biscuits with the melted butter. Stir until the mixture resembles wet sand.

        - Firmly press the crumb mixture into the bottom of an 8x8-inch baking dish lined with parchment paper, ensuring an even layer.

          - Bake in the preheated oven for about 10 minutes, then remove and let the crust cool slightly while you prepare the filling.

            Make the Cheesecake Filling:

              - In a large mixing bowl, use an electric mixer on medium speed to blend the softened cream cheese and powdered sugar until the mixture is smooth and creamy, about 2-3 minutes.

                - Add in the vanilla extract; mix until fully incorporated and the mixture is cohesive.

                  Fold in the Heavy Cream:

                    - In a separate bowl, use a whisk or electric mixer to whip the heavy cream until soft peaks form.

                      - Gently fold the whipped cream into the cream cheese mixture with a spatula. Be cautious to maintain the airy texture of the whipped cream while combining until just blended.

                        Layer the Filling:

                          - Once the crust has cooled down, pour the cheesecake filling over it, spreading it out evenly with a spatula for a smooth finish on top.

                            Chill:

                              - Cover the baking dish with plastic wrap or aluminum foil and place it in the refrigerator. Chill for a minimum of 4 hours, though allowing it to set overnight will yield the best results.

                                Drizzle and Serve:

                                  - After the cheesecake has set, carefully lift it out of the dish using the edges of the parchment paper. Cut into 9 equal squares.

                                    - Drizzle the top with warmed Biscoff spread, which should be fluid enough to create a beautiful drizzle effect. If desired, sprinkle crushed Biscoff biscuits over the drizzle for added texture.

                                      Enjoy:

                                        - Serve these luscious cheesecake bars chilled. They are perfect for parties, potlucks, or simply as a delightful treat for yourself!

                                          Prep Time: 20 minutes | Total Time: 4 hours 30 minutes | Servings: 9 bars

                                            - Presentation Tips: For an elegant touch, consider placing each bar on individual dessert plates with a fresh mint leaf beside it, or serve on a rustic wooden board for a more casual presentation.