Introduction
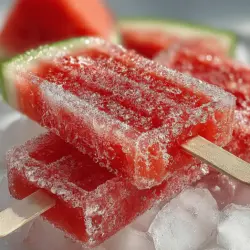
Summer is the perfect season for refreshing treats, and nothing embodies the essence of summer quite like homemade popsicles. These Refreshing Watermelon Bliss Pops offer a vibrant, sweet escape from the heat, making them an ideal snack for warm days. Bursting with the natural sweetness of ripe watermelon and a hint of zesty lime, these pops not only satisfy your sweet tooth but also provide a nutritious option for hot summer afternoons. This article will guide you through the benefits of watermelon, the simplicity of the recipe, and step-by-step instructions to create this delightful summer treat at home.
Understanding Watermelon as a Key Ingredient
Health Benefits of Watermelon
Watermelon is more than just a summer staple; it is a powerhouse of hydration and nutrition. Composed of about 92% water, this juicy fruit is an excellent choice for staying hydrated during the sweltering summer months. The high water content helps replenish fluids lost through sweat, making it a perfect ingredient for cooling popsicles.
In terms of nutritional value, watermelon is rich in vitamins A and C, both of which are vital for maintaining healthy skin and immune function. Vitamin A supports eye health, while vitamin C acts as a potent antioxidant, helping to combat oxidative stress in the body. Additionally, watermelon is low in calories—one cup contains approximately 46 calories—making it a guilt-free treat that can be enjoyed without compromising your dietary goals.
The Role of Lime Juice
To elevate the flavor profile of these Refreshing Watermelon Bliss Pops, lime juice plays a crucial role. The addition of fresh lime juice not only enhances the overall taste but also provides a boost of vitamin C, further enriching the nutritional value of the pops. The tangy acidity of lime helps to balance the natural sweetness of the watermelon, creating a refreshing flavor that is both invigorating and satisfying.
Lime juice can also aid in digestion and has been linked to various health benefits, including improved skin health and increased iron absorption. By incorporating lime juice into your watermelon pops, you are not only enhancing the taste but also introducing additional health benefits.
Ingredients Overview
Fresh Watermelon: The Star of the Pops
When it comes to making the best Refreshing Watermelon Bliss Pops, the quality of your watermelon is paramount. Selecting a ripe, seedless watermelon ensures optimal flavor and texture in your popsicles. To choose the best watermelon, look for one that feels heavy for its size, has a uniform shape, and features a creamy yellow spot, which indicates ripeness.
Once you have selected the perfect watermelon, preparing it for blending is straightforward. Start by thoroughly washing the exterior to remove any dirt or residues. Then, cut the watermelon in half and scoop out the flesh, discarding any seeds you may encounter. For a smoother texture in your pops, be sure to remove all seeds before blending the fruit into a puree.
Sweeteners: Honey vs. Agave Syrup
While watermelon is naturally sweet, you may want to enhance the flavor with a sweetener, particularly if your watermelon isn’t perfectly ripe. Two popular options for sweetening your pops are honey and agave syrup.
Honey is a natural sweetener that adds depth of flavor, along with its own unique health benefits, including antibacterial properties and antioxidants. However, it is important to note that honey is not suitable for vegans.
Agave syrup, on the other hand, is a vegan-friendly alternative that is sweeter than honey and has a lower glycemic index, making it a preferred choice for those monitoring their blood sugar levels. When deciding on a sweetener, consider your dietary preferences and adjust the sweetness levels according to your taste. Start with a small amount and gradually add more until you achieve your desired flavor.
Optional Coconut Water
For added hydration and a tropical twist, consider incorporating coconut water into your Refreshing Watermelon Bliss Pops. Coconut water is rich in electrolytes, making it an excellent choice for replenishing fluids after a hot day in the sun. It provides potassium, sodium, and magnesium, which can help maintain proper hydration levels.
Flavor-wise, coconut water adds a subtle nuttiness that complements the sweetness of the watermelon, creating a well-rounded and refreshing treat. If you choose to include coconut water, simply replace a portion of the watermelon puree with an equal amount of coconut water for a delightful variation.
Step-by-Step Instructions
Preparing the Watermelon
The first step in making Refreshing Watermelon Bliss Pops is preparing the watermelon. Begin by thoroughly cleaning the outer surface of the watermelon to remove any dirt or bacteria. Using a sharp knife, carefully cut the watermelon in half. Next, scoop out the flesh using a spoon or melon baller, being mindful to remove any seeds as you go. For a smoother texture in your pops, it’s essential to ensure that all seeds are eliminated.
Once you have collected the watermelon flesh, you can cut it into smaller chunks, which will make the blending process easier. This preparation will set the stage for creating a delicious watermelon puree that serves as the foundation for your refreshing popsicles.
Blending the Ingredients
After you have prepared the watermelon, the next step is blending the ingredients to achieve the perfect consistency. Place the watermelon chunks into a high-powered blender, and if you are using coconut water or a sweetener, add them at this stage. Blend the mixture on high until it reaches a smooth and creamy consistency. Depending on the power of your blender, this may take anywhere from 30 seconds to a minute.
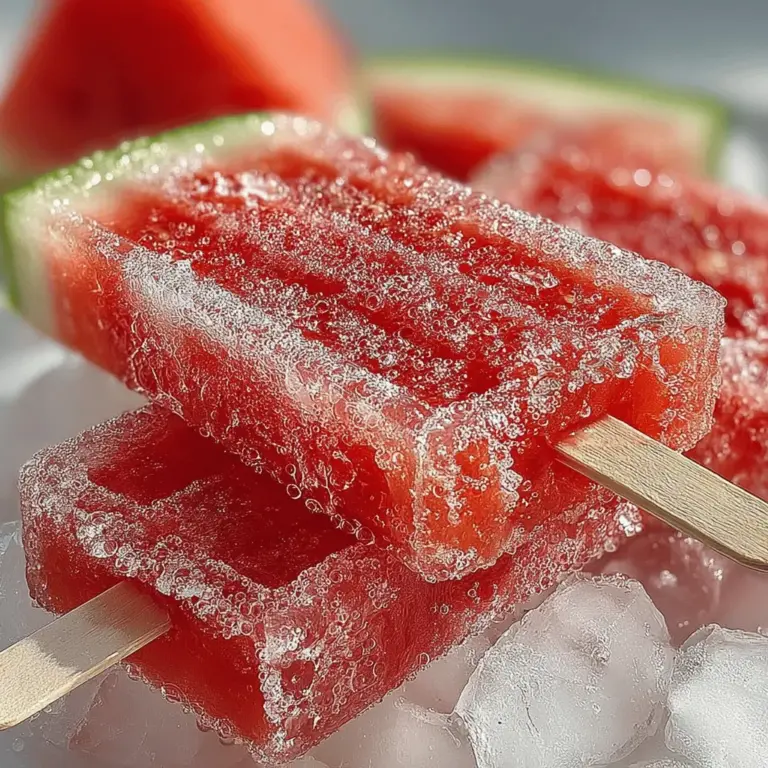
It’s important to taste the blended mixture at this point, adjusting the sweetness or acidity by adding more sweetener or lime juice as needed. The goal is to create a well-balanced flavor that captures the essence of summer in every bite. Once you have achieved the desired taste and consistency, you are ready to pour the mixture into your popsicle molds and freeze them to create your Refreshing Watermelon Bliss Pops.
{{image_2}}
Tips for Proper Blending Technique
To create the perfect Watermelon Bliss Pops, achieving a smooth and consistent blend is essential. When blending your watermelon, consider the following tips to enhance the texture and flavor of your popsicles.
Tasting and Adjusting Sweetness
One of the best parts of making your own popsicles is the ability to cater to your taste preferences. Here’s how to ensure your popsicles are just the right level of sweetness:
– Importance of Taste Testing: As you blend your watermelon, take a moment to taste the mixture before pouring it into the molds. Watermelons can vary in sweetness depending on ripeness, so tasting allows you to adjust as needed.
– How to Incorporate More Sweetener Effectively: If you find the blend isn’t sweet enough for your liking, consider adding natural sweeteners like honey, agave syrup, or a bit of sugar. Add a tablespoon at a time, blend, and taste again until you reach your desired sweetness. This method prevents over-sweetening and ensures a balanced flavor.
Filling the Molds
Once your mixture is blended to perfection, it’s time to fill the popsicle molds.
– Importance of Leaving Space for Expansion: Watermelon pops will expand when frozen, so it’s crucial to leave a little space at the top of each mold—about half an inch. This will prevent overflow and ensure that your popsicles freeze nicely without becoming misshapen.
– Tips for a Mess-Free Pouring Process: To keep things tidy, consider using a funnel to pour the watermelon puree into the molds. If you don’t have a funnel, you can use a measuring cup with a spout for more controlled pouring. This will minimize spills and give you a cleaner result.
Inserting the Sticks
Inserting the popsicle sticks properly is vital for ensuring they stay upright during the freezing process.
– Pre-Freezing Technique to Stabilize Sticks: After filling the molds, place them in the freezer for about 30 minutes before inserting the sticks. This initial chilling will help the mixture firm up slightly, allowing the sticks to stand straight without leaning or falling over.
– Ensuring Even Popsicle Shapes: When the mixture is set enough to hold the sticks, carefully insert them into the center of each mold. Ensure that the sticks are evenly spaced and upright to create beautifully shaped popsicles.
Freezing Process
The freezing process is where the magic happens, turning your mixture into refreshing pops.
– Covering Molds to Prevent Odors: To maintain the flavor integrity of your popsicles, cover the molds with plastic wrap or a lid. This will help prevent any unwanted odors from other items in your freezer from seeping into your pops.
– Recommended Freezing Time for Best Results: To achieve the best texture, allow your pops to freeze for at least 4-6 hours, or overnight if possible. This ensures they are completely solid, making them easier to unmold and enjoy.
Unmolding and Serving
Once your pops are fully frozen, it’s time to enjoy your delicious creations!
– Techniques for Easy Unmolding: To release the popsicles from the molds, run warm water over the outside of the molds for a few seconds. This gentle warming will loosen the pops without melting them. If you’re using silicone molds, gently flex them to help release the pops.
– Creative Serving Ideas to Impress Guests: For a stunning presentation, serve your Watermelon Bliss Pops on a decorative platter or in clear glasses. You can also create a fun display by sticking the pops into a bucket filled with ice. Consider garnishing with fresh mint leaves or lime wedges to add a splash of color and flavor.
Storage Tips for Leftover Popsicles
If you’ve made a large batch of popsicles, it’s important to store them properly to maintain their quality.
Best Practices for Freezing
– Wrapping Individually to Prevent Freezer Burn: After unmolding, wrap each popsicle in plastic wrap or place them in freezer bags, ensuring all air is removed. This will help prevent freezer burn and keep your treats tasting fresh.
– Recommended Storage Duration: Properly stored, your Watermelon Bliss Pops can last in the freezer for up to 2 months. However, for the best taste and texture, try to enjoy them within the first month.
Presentation Ideas for Serving
An appealing presentation can elevate your homemade popsicles and impress your guests.
Creative Serving Suggestions
– Serving on Decorative Plates or in Glasses: Consider placing your popsicles on colorful plates or in decorative glasses for a visually appealing display. This will not only make serving easier but also create a delightful atmosphere for your gathering.
– Garnishing with Mint Leaves or Lime Wedges for a Vibrant Look: Adding fresh mint leaves or lime wedges next to your popsicles not only enhances the visual appeal but also adds a refreshing aroma. You can also drizzle a bit of lime juice over the pops for an extra zing that complements the watermelon flavor beautifully.
Conclusion
Refreshing Watermelon Bliss Pops are a delightful and healthy summer treat that anyone can make at home. This recipe not only highlights the natural flavors of watermelon but also allows you to customize it to your taste. Whether you’re hosting a summer gathering or simply looking for a way to cool off, these popsicles are a simple yet satisfying option. Embrace the summer sun and enjoy the refreshing taste of these homemade treats!
By following these steps and tips, you can create a batch of Watermelon Bliss Pops that will be the highlight of your summer days. With their vibrant flavor and easy preparation, these pops are sure to become a favorite for family and friends alike. So gather your ingredients, unleash your creativity, and dive into the joy of making your own refreshing popsicles!