
Crispy Hatch Chili Quesadillas: A Flavorful Journey into Tex-Mex Cuisine
Introduction
Welcome to the irresistible world of Tex-Mex cuisine, where bold flavors and comforting ingredients come together to create dishes that are both satisfying and memorable. Among these culinary delights, Crispy Hatch Chili Quesadillas stand out as a perfect blend of texture and taste. These quesadillas are not only crispy on the outside but also packed with a creamy, cheesy filling that will make your taste buds dance. Whether you’re hosting a lively gathering with friends, preparing a fun family dinner, or simply craving a quick yet delicious meal, this recipe is designed to impress.
Originating from the rich and diverse culinary landscape of the Southwestern United States, Tex-Mex cuisine is a fusion of Mexican and American flavors, often highlighting ingredients such as cheese, beans, and spices. The star of our recipe, the Hatch green chili, hails from Hatch, New Mexico, known for its unique flavor profile that adds a smoky and slightly sweet undertone to any dish. This ingredient truly elevates the humble quesadilla, transforming it into a gourmet experience.
In this article, we will delve into the essential ingredients that make up our Crispy Hatch Chili Quesadillas, guide you through the preparation of the filling, and help you assemble these delightful treats. Let’s embark on this flavorful journey together.
Understanding the Ingredients
To create the perfect Crispy Hatch Chili Quesadillas, it’s crucial to understand the role each ingredient plays in building flavor and texture. Let’s take a closer look at the key components that make this recipe so special.
– Flour Tortillas: The foundation of any quesadilla, flour tortillas provide a soft yet sturdy base. Their mild flavor allows the other ingredients to shine while offering a delightful chewiness that contrasts beautifully with the crispy exterior when cooked. Opt for high-quality tortillas for the best results, as they will hold up better during cooking and enhance the overall texture of the dish.
– Cheeses: A combination of Monterey Jack and sharp cheddar is ideal for this recipe. Monterey Jack melts beautifully, creating a creamy texture, while sharp cheddar adds a robust flavor that complements the other ingredients. This cheesy mixture not only binds the filling together but also contributes to the overall richness of the quesadilla.
– Hatch Green Chiles: The real star of this dish, Hatch green chiles, are renowned for their distinctive flavor, which is both smoky and mildly spicy. When roasted, these chiles release their natural sweetness and depth, making them a perfect addition to our quesadillas. If you can’t find fresh Hatch chiles, roasted canned versions are a great alternative.
– Black Beans: Not only do black beans provide a hearty texture, but they also contribute protein and fiber, making the quesadillas more filling and nutritious. Their earthy flavor pairs well with the chiles and cheeses, enhancing the overall taste without overwhelming the dish.
– Cilantro and Spices: Fresh cilantro adds a bright, herbal note that elevates the flavors of the quesadilla. When combined with spices such as cumin and garlic powder, these ingredients create a well-rounded filling that is aromatic and satisfying. The right balance of seasoning is essential to ensure that every bite is bursting with flavor.
Preparing the Filling
Once you have gathered all your ingredients, it’s time to prepare the filling for your Crispy Hatch Chili Quesadillas. Here’s a step-by-step guide to ensure you achieve the perfect blend of flavors and textures.
1. Mixing the Cheeses: Start by grating your Monterey Jack and sharp cheddar cheeses. In a mixing bowl, combine equal parts of both cheeses. This combination will create a melty, creamy filling that is rich and satisfying.
2. Preparing the Hatch Chiles: If you’re using fresh Hatch chiles, roast them until the skin is charred and blistered, which can be done on a grill or under a broiler. Once roasted, allow them to cool slightly, then peel off the skin, remove the seeds, and chop them into small pieces. If using canned chiles, drain and chop them finely.
3. Combining Ingredients: In the same mixing bowl with the cheeses, add the chopped Hatch chiles and a can of drained black beans. Use a fork or spatula to gently combine the ingredients, ensuring an even distribution of chiles and beans throughout the cheese mixture.
4. Adding Fresh Herbs and Spices: Finely chop a handful of fresh cilantro and add it to the filling mixture. Next, season with spices such as cumin, garlic powder, and a pinch of salt. Start with small amounts and adjust to taste; you want the flavors to be balanced but not overpowering. Mix thoroughly until all the ingredients are well combined.
5. Achieving the Right Balance: Taste the filling before using it to ensure a harmonious blend of flavors. The cheese should be the star, supported by the smoky chiles and the earthy black beans, with the spices enhancing the overall profile. Adjust the seasoning as needed, keeping in mind that the quesadillas will be cooked, which can slightly mellow the flavors.
With the filling prepared, you’re now ready to assemble your Crispy Hatch Chili Quesadillas. The combinations of flavors and textures from the creamy cheese, smoky chiles, and hearty beans will create a delicious dish that is sure to impress. In the next section, we will guide you through the process of assembling and cooking these mouthwatering quesadillas to perfection.
{{image_2}}
Technique for Assembly
Assembling your quesadillas correctly is crucial for achieving that perfectly crispy exterior while keeping all the delicious filling intact. Start by laying your tortilla flat on a clean surface. For optimal crispness, choose flour tortillas, as they tend to crisp up nicely compared to corn tortillas.
Next, sprinkle a generous amount of shredded cheese (such as Monterey Jack or cheddar) on one half of the tortilla. Cheese acts as a glue that helps hold the filling together, so don’t skimp on it. On top of the cheese, evenly distribute your Hatch chiles, cooked black beans, and any additional ingredients, like sautéed onions or corn.
When it comes to folding the tortilla, carefully lift the empty half and fold it over the filled half. Press down gently to seal the edges. It’s important to ensure that the filling is not overflowing; otherwise, you risk a messy cooking process.
Preventing Overflow
To prevent overflow during cooking, follow a few best practices. First, avoid overfilling your quesadillas. While it might be tempting to load them up, keeping the filling to a moderate amount ensures that everything stays contained. Aim for about ½ to ¾ cup of filling per quesadilla.
Another tip is to use a fork to crimp the edges of the tortilla after folding. This not only helps seal the quesadilla but also creates an appealing design on the edges. You can also lightly brush the edges with a bit of melted butter or olive oil to help create a more secure seal and enhance the golden color as they cook.
Cooking the Quesadillas
Choosing the Right Skillet
The type of skillet you use can significantly affect the cooking outcome. A cast iron skillet is often the best choice for frying quesadillas because it retains heat well and distributes it evenly. If you don’t have a cast iron skillet, a non-stick skillet is a good alternative. Ensure that your skillet is large enough to fit one or two quesadillas at a time, depending on your cooking capacity.
Temperature Control
Temperature control is key to cooking your quesadillas to perfection. Set your skillet over medium heat, allowing it to warm up for a few minutes. If the skillet is too hot, the outside will burn while the inside remains cold. Conversely, if the heat is too low, the quesadillas will take longer to cook and may become soggy instead of crispy.
To check if the skillet is ready, sprinkle a few drops of water onto the surface; if they sizzle and evaporate quickly, you’re good to go.
Frying Techniques
Once your skillet is heated, it’s time to fry your quesadillas. Add a tablespoon of oil (such as vegetable or olive oil) to the skillet, swirling it around to coat the surface evenly. Gently place your assembled quesadilla in the skillet, cooking it for about 3-4 minutes on one side, or until it’s golden brown and crispy.
To flip the quesadilla without spilling the filling, use a large spatula to lift one side while gently nudging it over with another spatula or your hand. If you’re cooking multiple quesadillas, you might want to have a second spatula ready to support the other side during the flip.
After flipping, cook for another 3-4 minutes until the second side is equally golden and crispy. Once done, remove the quesadilla from the skillet and let it rest on a paper towel to absorb any excess oil. This also helps keep the quesadilla crispy.
Serving Suggestions
Presentation Ideas
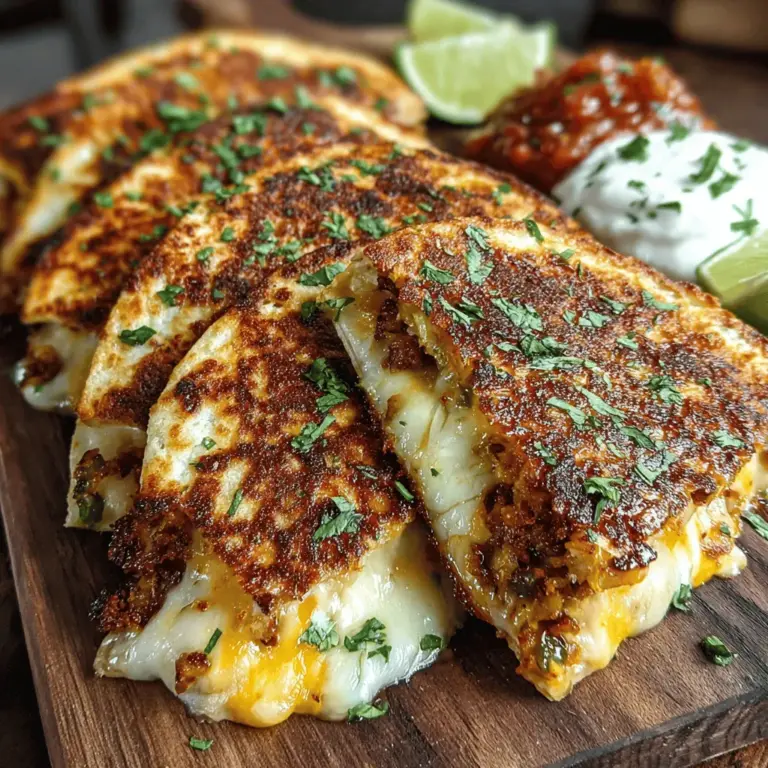
Presentation plays a vital role in elevating your dish. Cut your quesadillas into wedges, resembling pizza slices, and arrange them on a vibrant plate. For a festive touch, you can garnish with fresh cilantro or chopped green onions.
Consider adding a dollop of sour cream or a generous scoop of guacamole in the center of the plate for a pop of color and flavor contrast. Using a colorful platter or a rustic wooden board can enhance the visual appeal of your quesadilla presentation.
Accompaniments
Pair your crispy Hatch chili quesadillas with an assortment of dips for an exciting flavor experience. Traditional options like sour cream and salsa are perfect companions. You can also include a zesty avocado dip or a refreshing pico de gallo to add some freshness. Lime wedges on the side enhance the dish’s flavor profile, allowing each guest to squeeze some lime juice over their quesadilla, elevating the taste even further.
Nutritional Benefits
Ingredient Insights
The ingredients in your crispy Hatch chili quesadillas not only contribute to their delightful flavor but also offer various health benefits. Hatch chiles, for instance, are rich in vitamins A and C, boosting your immune system and skin health. They also contain capsaicin, which has been linked to metabolism enhancement and pain relief.
Black beans are another nutritional powerhouse; they are high in protein and fiber, supporting digestive health and providing a feeling of fullness. Combined, these ingredients make your quesadillas not just a tasty treat but a meal that can contribute positively to your overall health.
Balancing Indulgence
While crispy Hatch chili quesadillas can be considered an indulgent dish, they can fit into a balanced diet with mindful preparation. Using whole-grain tortillas can increase the fiber content of your meal, while adding fresh vegetables not only enhances the nutritional value but also adds color and crunch.
By controlling portion sizes and serving the quesadillas with healthy accompaniments, you can enjoy a satisfying meal that doesn’t compromise your dietary goals.
Conclusion
Crispy Hatch chili quesadillas offer not just a meal but an experience filled with flavor and texture. Perfect for any occasion, this dish brings together a medley of ingredients that celebrate the vibrant culture of Tex-Mex cuisine. With easy preparation and cooking steps, you’re now equipped to create these delightful quesadillas in your own kitchen.
Enjoy the crispy, cheesy goodness that is sure to satisfy your taste buds and impress your guests. Whether for a casual family dinner, a lively gathering with friends, or a fun snack, these quesadillas are a versatile option that will leave everyone asking for seconds. Dive into this culinary adventure and savor every delicious bite!
